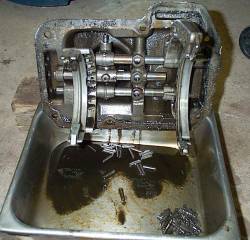
Next we packed needle bearings into lower shaft. Used petroleum jelly to hold it all together. The petroleum jelly will disintegrate once exposed to the gear oil. This is where the one inch dowel rod comes into play. Each bearings set gets 22 bearings. The bearings go in in specific order with the tub in the center of it all. Moving outward from the tub each side (front/rear) gets a ring, 22 bearings, a rings, 22 bearings and a final ring.
This is the tricky part. We then lowered the gears into case while holding shims and washers at each end. Refer to your manual for which shims and washers go where. I used a short piece of the 1 inch dowel to help hold the washers in place while lowering the gear set. It took a few trys but we got it lined up right. Next we tapped the lower shaft into place pushing dowel rod out while keeping pressure on dowel to prevent it from bouncing out to fast.


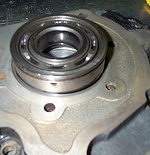
Next we packed the input shaft with needle bearings using petroleum jelly again to hold them in place. No dowel with this set of bearings. Then we lowered both of the upper gear sets into case with the front and rear going though the case openings and gently lowering the center putting them together. Remember those needle bearings will move easily so be careful. Once together we put new main bearings in the front and rear of the case. Take note of width of bearings. Larger width in rear, narrow in front. I had been informed that some people were getting the two main bearing and they were the same size when there should have been different sizes for front and rear. Those people had to re-order a bearing or reuse the old one that wasn’t included. I had the right sizes. Gentle tap bearings onto shafts. Use a pipe or gentle tap on inner part of bearing with a wooden block and a hammer. Alternate sides if using a block.

The Front bearing needs to be in right place (close to the snap ring on the shaft) or shaft cover will bind the bearing. I discovered this when I went to bolt on the shaft cover for a test fit. I had to tap shaft in using a piece of aluminum sheet metal to cover the end of the shaft and hit it with a hammer. I then greased the seal that’s part of the shaft cover, applied gasket sealer, gasket, more gasket sealer and put shaft cover on with port side down. Not too much sealer around port as not to clog the port but enough to seal it.

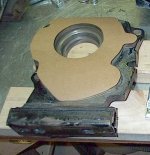
The top half was then cleaned and the casket and gasket sealer was removed using a wire wheel on a drill to brush off the silicone sealant.
T-18A to Dana 20 Adapter
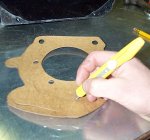
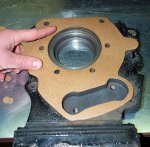
I removed the seal with WD-40 can and cleaned the adapter. I couldn’t find a gasket that is to go between the T-18A and the adapter so I made a gasket.

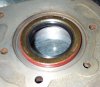
I then put the new seal in using the old bearing from teh T-18A which fit perfectly over the seal. The main thing is to push on outer rim of seal only as not to damage the seal. I then cleaned the adapter again, applied gasket sealer, the gasket, more sealer and bolted it on. Cleaning the bolts too helps to seal it better.
 |
 |
 |
 |
 |
PTO plate was remove later, cleaned painted and attached with new gasket.

Clean top half, remove old Teflon guides and replace with new from kit.


Before filling with gear oil and sealing it up I did a test fit of the top for proper alignment of gears. I put a few bolts in to test run gears. Everything worked well and I removed the top without moving the gear position.
It was then filled with an 80W 90 GL-5 gear oil to to fill bolt (maybe a little more). The seal area was cleaned again and on went the sealer, gasket, sealer and the top. A final run though the gears again before a torque down of all the bolts.
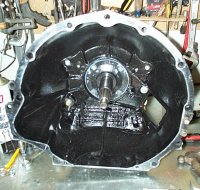
Test fit of the cleaned and painted V8 bell housing.